Have you ever walked into a beautifully designed room and wondered what makes it feel so polished and expensive? More often than not, the secret lies in the details—and one of the most overlooked details is the windows. Professional interior designers have a trick that instantly elevates any space: layering curtains.
I’ve spent years studying what separates amateur decorating attempts from professionally designed spaces, and curtain layering consistently emerges as one of the most impactful techniques. The best part? You don’t need a design degree or unlimited budget to master this skill. With the right approach, you can transform your ordinary windows into stunning focal points that rival those in high-end magazines.
Let me walk you through everything I’ve learned about creating sophisticated, layered window treatments that will completely change how your rooms look and feel.
Why Smart Homeowners Are Ditching Single-Layer Curtains
When I first started paying attention to window treatments, I made the same mistake most people make: I hung one set of curtains and called it done. It wasn’t until I visited a friend’s professionally designed home that I realized what I was missing.
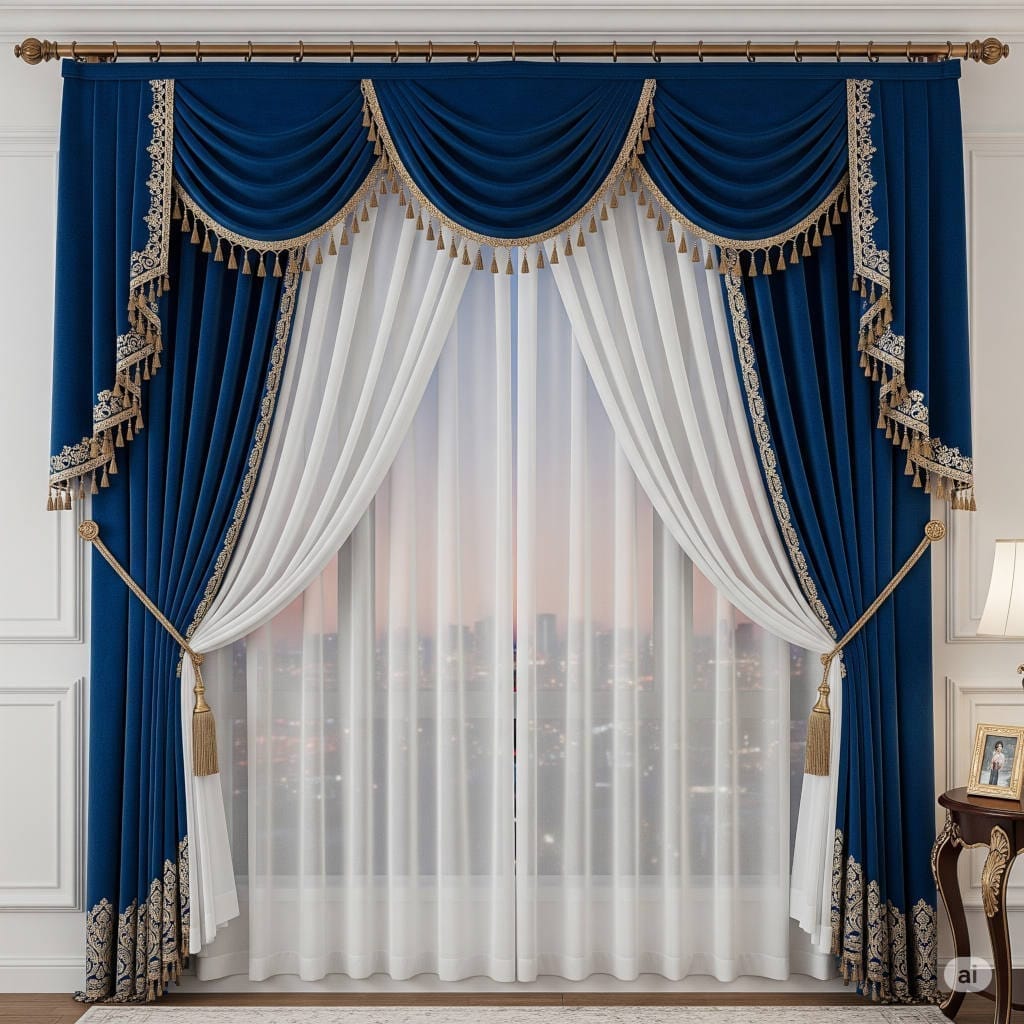
Her living room windows had what appeared to be simple white curtains, but something about them looked incredibly luxurious. Upon closer inspection, I discovered she actually had three different layers working together seamlessly. There were gauzy white sheers closest to the window, flowing linen panels in the middle, and rich velvet drapes on the outside—all in coordinating but slightly different shades of white and cream.
This layered approach solved multiple problems simultaneously. During the day, she could open the heavy outer curtains and keep the sheers closed for privacy without blocking natural light. In the evening, she could close everything for complete privacy and light control. The different textures created visual depth that made her windows appear larger and more important in the room’s design.
That’s when I understood why single-layer curtains often fall flat. They’re trying to do too many jobs at once, and they can’t excel at any of them. Layering allows each component to specialize while creating a cohesive, sophisticated look.
The Three-Layer System That Actually Works
After experimenting with various combinations, I’ve found that most successful layered treatments follow a three-component system. Think of it like getting dressed—you might wear a light base layer, a middle layer for style, and an outer layer for weather protection.
The Foundation Layer: Your Privacy Shield
Your innermost layer should be lightweight and translucent. This is your daytime privacy solution that still allows natural light to filter through beautifully. I’ve had great success with linen sheers, cotton voiles, and high-quality polyester options that resist wrinkles.
The key insight here is that this layer doesn’t need to be purely white. Off-white, cream, pale gray, or even subtle colors can work wonderfully if they complement your overall scheme. I once used pale sage sheers in a bedroom with green undertones, and they added just enough color to feel intentional without being overwhelming.
The Character Layer: Where Personality Shines
Your middle layer is where you can really express your style. This is typically a medium-weight fabric that adds color, pattern, or interesting texture to your windows. I’ve used everything from striped cotton to subtle geometric prints to solid linens with beautiful drape.
This layer doesn’t always need to close completely. Sometimes I design treatments where the middle layer is more decorative than functional, adding visual interest even when partially or fully open. The important thing is that it contributes to the overall aesthetic while providing moderate light control when needed.
The Power Layer: Your Light and Privacy Control
Your outermost layer handles the heavy lifting—literally and figuratively. These curtains provide maximum light blocking and privacy when you need it. I typically choose heavier fabrics like velvet, thick cotton, wool, or specialized blackout materials.
Here’s something many people miss: your outer layer doesn’t have to match your middle layer exactly. In fact, subtle contrast often creates more visual interest. I might pair cream sheers with soft gray middle curtains and charcoal outer panels for a sophisticated monochromatic scheme with depth.
The Hardware Game-Changer You Need to Know About
I cannot overstate how important proper hardware is to achieving professional results. I’ve seen beautiful, expensive fabrics look cheap because they were hung on inadequate hardware, and I’ve seen budget fabrics look luxurious when properly supported.
Double Rod Systems: The Reliable Choice
For most applications, I recommend adjustable double rod systems. Look for ones where you can control the spacing between rods—you’ll want about 2-3 inches between them for most fabric combinations. The front rod should extend 8-12 inches beyond each side of your window frame, and the back rod can be slightly shorter if needed.
Pay attention to weight capacity. Your hardware needs to support all layers combined, plus account for the gathering that happens when curtains are drawn. I always choose hardware rated for significantly more weight than I calculate I’ll need.
Ceiling-Mounted Tracks: The Professional Upgrade
If you’re ready to invest in a more sophisticated system, ceiling-mounted curtain tracks offer superior functionality and appearance. They allow curtains to hang from ceiling to floor, creating the illusion of taller windows and more dramatic proportions.
Track systems also operate more smoothly than rod systems, especially with heavy layered treatments. The investment is worthwhile if you’re creating layered treatments for multiple windows or if smooth operation is important for frequently adjusted curtains.
Color Coordination That Actually Makes Sense
One of the biggest challenges in layering curtains is creating a cohesive color story that enhances rather than overwhelms your space. I’ve developed a practical approach that takes the guesswork out of color selection.
The Gradient Approach
Start with your room’s existing color palette and create a gradient across your curtain layers. If you have blue walls, you might use white sheers, pale blue middle curtains, and deeper blue outer panels. This creates depth while maintaining harmony.
I used this technique in a client’s dining room with sage green walls. We layered cream sheers, soft sage middle curtains, and deep forest green velvet outer panels. The result was sophisticated and cohesive, with each layer feeling intentional rather than random.
The Neutral Foundation Method
If you’re nervous about color, start with varying neutrals across your layers and add color through accessories. Cream sheers, natural linen middle curtains, and charcoal outer panels work in virtually any room while still providing visual interest through texture and tone variation.
This approach is particularly effective if you like to change your decor seasonally or if you’re still developing your personal style. The neutral foundation allows flexibility while looking polished and intentional.
The Pop of Color Strategy
For those who want more drama, consider keeping two layers neutral and adding color in one layer. I often use white sheers and cream outer curtains with a colored middle layer that echoes other accents in the room. This creates interest without overwhelming the space.
Fabric Selection: What Works and What Doesn’t
Through trial and error, I’ve learned which fabric combinations create professional results and which combinations fight against each other. Here’s my practical guide to fabric selection for each layer.
Sheer Layer Fabrics That Actually Work
Natural linen sheers are my go-to choice for most applications. They have beautiful texture, filter light gorgeously, and develop character over time. Cotton voiles work well if you want something easier to maintain, and high-quality polyester sheers can be excellent for high-humidity areas like bathrooms.
Avoid overly shiny or synthetic-looking sheers—they cheapen the overall effect. Also skip anything too textured or busy for this layer, as it will compete with your other layers rather than supporting them.
Middle Layer Options for Every Style
This is where you can really have fun with texture and color. Linen remains my favorite for its natural drape and timeless appeal, but cotton blends, lightweight wools, and even some synthetic options can work beautifully.
Consider the maintenance requirements for this layer since it’s often the most decorative and potentially the most expensive to replace. If you have pets or children, choose fabrics that can handle regular cleaning.
Outer Layer Powerhouses
Velvet creates instant luxury and provides excellent light blocking, but it requires more maintenance than some alternatives. Heavy cotton or cotton blends offer durability with good light control. Wool can be beautiful but may be overkill in warmer climates.
For practical applications like bedrooms or media rooms, don’t overlook modern blackout fabrics. Today’s options are far more attractive than earlier versions, and the functionality may be worth prioritizing over pure aesthetics.
Installation Secrets That Make All the Difference
Professional installation separates amateur attempts from designer-quality results. These techniques might seem minor, but they have major impact on the final appearance.
The High and Wide Rule
Mount your hardware 6-8 inches above your window frame and extend it 6-12 inches beyond each side. This makes windows appear larger and allows maximum light when curtains are open. I’ve used this technique to make small windows look generous and standard windows look grand.
For rooms with high ceilings, consider going even higher—sometimes I mount hardware just 12 inches below the ceiling line for dramatic effect, especially when the curtains will hang to the floor.
Proper Layer Spacing
Each layer should have adequate space to hang properly without interference. Your sheers should hang closest to the window, with each successive layer positioned progressively farther out. This prevents tangling and allows each layer to maintain its intended drape.
I typically allow 2-3 inches between the back of sheers and the front of middle curtains, and another 2-3 inches between middle curtains and outer panels. Adjust these distances based on your specific hardware and fabric choices.
Length Considerations for Each Layer
Different layers can hang at different lengths for aesthetic effect. I often let sheers puddle slightly on the floor for romance, keep middle curtains just touching the floor, and hang outer curtains with a slight break for a tailored look.
The key is making length differences look intentional rather than accidental. Document your measurements carefully and maintain consistency across similar windows in the same space.
Daily Operation and Styling Tips
Once your layered treatment is installed, knowing how to operate and style it properly maintains the professional appearance. I’ve developed routines that keep layered treatments looking their best.
Training Your Curtains
New curtains need time to develop proper hanging habits. After installation, arrange the folds neatly and secure them with curtain ties for several days. This trains the fabric memory and ensures consistent, elegant draping.
For heavy or lined curtains, this training period is especially important. The fabric needs time to settle into its natural hanging pattern, and rushing this process results in uneven or awkward draping.
Strategic Opening and Closing
The beauty of layered treatments lies in their flexibility. You might keep sheers closed while opening middle and outer layers, or close outer layers while keeping inner layers open. Experiment with different combinations to find what works best for each time of day and activity.
I often photograph different configurations to remember which combinations I like best. This helps maintain consistency and makes it easier to return to preferred settings after cleaning or rearranging.
Maintenance Routines That Work
Different layers may require different cleaning schedules and methods. Sheers might need more frequent cleaning due to their proximity to windows and exposure to condensation. Outer layers might go longer between cleanings but require professional care when they do need attention.
Establish a rotation system for cleaning different layers so you’re never without window coverage. I typically clean one layer at a time, allowing the remaining layers to maintain privacy and light control.
Budget-Smart Layering Strategies
Creating designer-quality layered treatments doesn’t require designer budgets. I’ve developed strategies that maximize impact while controlling costs.
The Phased Approach
Start with one high-quality layer and build your collection over time. Beginning with excellent sheers gives you immediate improvement and privacy, then you can add middle and outer layers as budget allows. This approach also lets you live with the first layer and refine your vision before committing to additional purchases.
Strategic Splurging
Invest your money where it will have the most impact. High-quality hardware supports everything else and lasts for years. One beautiful outer layer can elevate budget-friendly sheers and middle curtains. Choose your splurge items carefully for maximum return on investment.
DIY and Professional Hybrid
Some aspects of layered treatments are perfect DIY projects, while others benefit from professional expertise. Simple sheers are relatively easy to make or hem yourself, while complex lined outer curtains might be worth professional investment. Mixing DIY and purchased elements can achieve professional results at reasonable cost.
Room-Specific Adaptations
Different rooms have unique requirements that should influence your layering approach. Understanding these nuances helps create appropriate solutions for each space.
Bedroom Layering for Better Sleep
Bedrooms benefit from comprehensive light control for quality sleep. I typically use room-darkening middle layers combined with blackout outer layers, creating options for everything from gentle morning light to complete darkness.
Consider the direction your bedroom windows face when selecting fabrics. East-facing bedrooms need stronger light control for morning sleepers, while west-facing rooms might prioritize afternoon heat reduction.
Living Room Flexibility
Living rooms require adaptable lighting for various activities. Focus on layers that can be adjusted independently to accommodate everything from bright cleaning sessions to intimate evening entertaining. This is where the strategic opening and closing techniques become especially valuable.
Kitchen and Bathroom Special Considerations
High-moisture areas need fabrics that can handle humidity and require easy care. Synthetic blends often perform better than natural fibers in these environments, though they can still be layered effectively for style and privacy.
Consider shorter curtains in kitchens to avoid grease and food splatter, and ensure bathroom treatments can be easily removed for cleaning when necessary.
Seasonal Refreshing and Long-Term Success
Professional designers often adjust window treatments seasonally to refresh rooms and adapt to changing light conditions. Planning for this flexibility from the beginning ensures your layered treatments remain fresh and functional year-round.
Summer and Winter Adaptations
Summer layers might emphasize light colors and breathable fabrics that don’t trap heat, while winter layers could introduce richer colors and heavier textures that add warmth and coziness. Consider having lighter and heavier versions of outer layers that you can swap seasonally.
Updating Without Starting Over
The beauty of layered treatments is that you can refresh your look by changing just one layer. New middle curtains can completely transform the appearance while keeping your investment in quality sheers and outer panels. This approach keeps your windows looking current without major expense.
Your Path to Designer-Quality Windows
Mastering curtain layering is about understanding how different elements work together to create something greater than the sum of their parts. It requires attention to color, texture, proportion, and functionality, but the transformation it creates is remarkable.
The key to success lies in planning your layered treatment as a complete system rather than individual components. Consider how each layer will function independently and in combination with others. Think about your daily routines, seasonal needs, and long-term style goals.
Remember that achieving professional results is a process that evolves over time. Start with a solid foundation and build your layered treatment thoughtfully. With patience and attention to detail, you can create window treatments that rival those found in the most sophisticated designer spaces.
The investment in layered curtains pays dividends in both functionality and aesthetic appeal. Your windows become focal points that anchor your room’s design while providing practical benefits of superior light control, privacy, and insulation. Most importantly, you’ll have created spaces that truly reflect sophisticated design sensibilities and enhance your daily living experience.
Whether you’re starting from scratch or upgrading existing treatments, these techniques will help you achieve the polished, professional look that makes all the difference in creating a home that feels truly designed rather than just decorated.